NIE APPOINTMENT
Guide to making your NIE Application Appointment Online
[This guide is not official, this was completed through my own experence]
Step 1 - Go to Web Site
- Click on button
Step 2 - Select Province
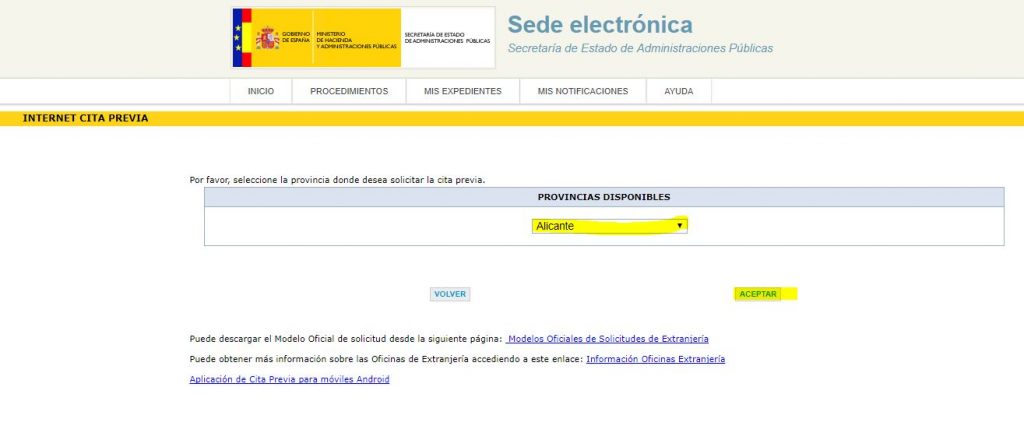
- Select the province for your appointment
- Click “ACEPTAR” to move on
Step 3 - Select Appointment Reason

- Select the “CNP-Asignación de N.I.E”.
- Click “ACEPTAR” to move on
Step 4 - Documents needed for the Appointment
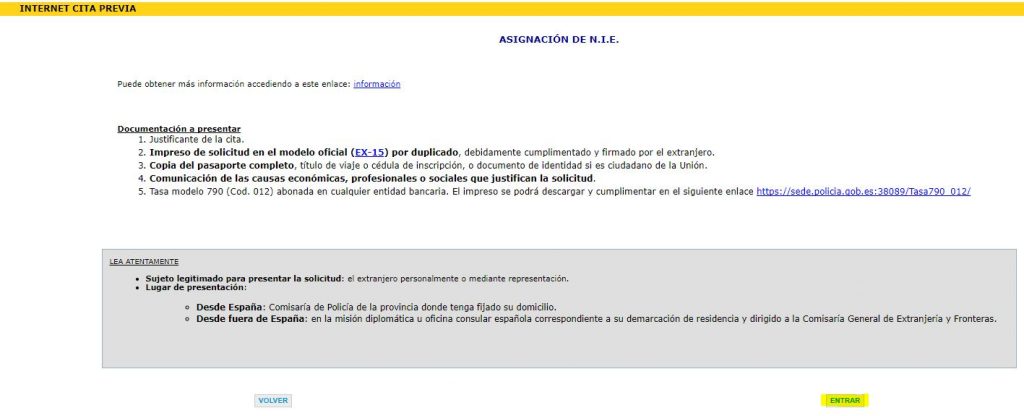
- Shows which documents you need to take to the appointment
- 1. Appointment Slip (to print after this process)
- 2. NIE Application Form x 2 [NIE APPLICATION FORM]
- 3. Copy of your passport and actual passport
- 4. Proof of reason for NIE application (although I have never been asked for this)
- 5. Tax model 790 code 012 Payment Form and Reciept of payment [NIE TAX PAYMENT]
- Click “Entrar” to move on
Step 5 - Enter your Details
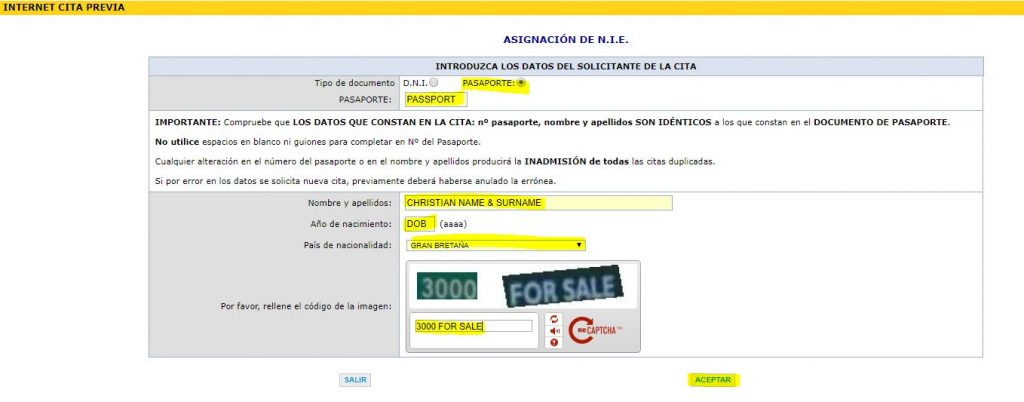
- Complete the yellow highlighted fields
- DOB = Enter your year of birth
- Enter the reCAPTCHA code, the characters you see in the images
- Click “ACEPTAR” to move on
Step 6 - Appointment Request, Check or Cancel
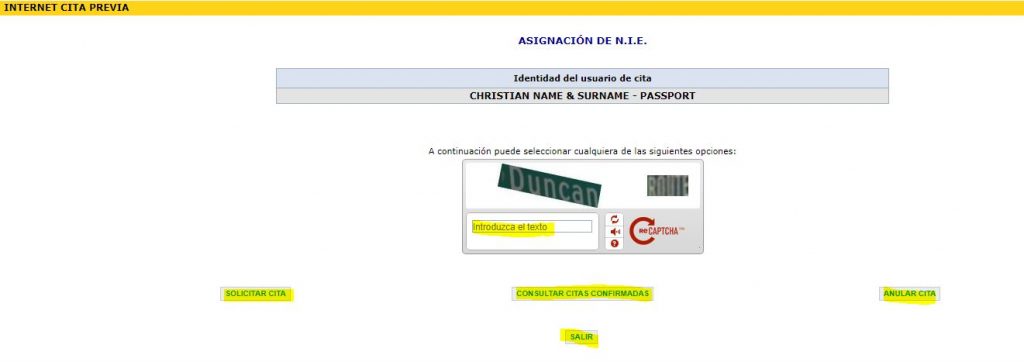
- Enter the reCAPTCHA code, the characters you see in the images
- Click “SOLICITAR CITA”
- You could also;
- Solicitar – Request Appointment
- Consultar – Check Appointment
- Anular – Cancel Appointment
- Salir – Exit
Step 7 - Appointment Location

- Select location of your choice
- Click “SIGUIENTE” to move on
Step 8 - Your Contact Details
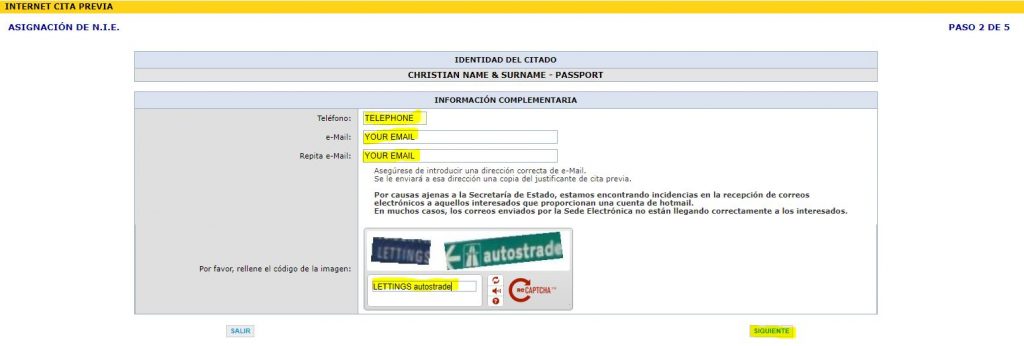
- Complete the yellow highlighted fields
- Enter the reCAPTCHA code, the characters you see in the images
- Click “SIGUIENTE” to move on
Step 9 - Appointment Dates and Times

- Select one of the 3 appointment date and times offered
- You only have 5 minutes to choose
- Click “SIGUIENTE” to move on
Step 10 - Confirm Appointment Details

- Review your appointment details
- Tick the 2 boxes to confirm and receive an email of confirmation
- Click “CONFIRMAR” to move on
Step 11 - Appointment Confirmation Number
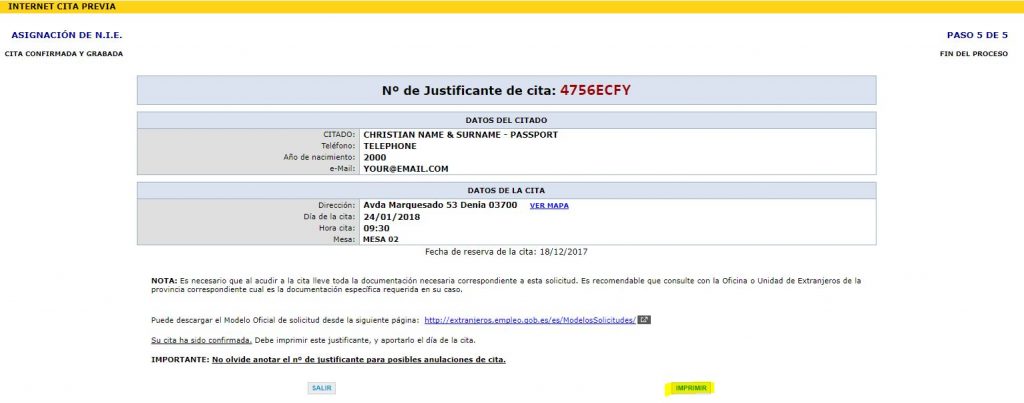
- Very important to print out this page if you did not recieve a confirmation email
- Click “IMPRIMIR” to print
- You must take this “confirmation print-out” to your appointment
